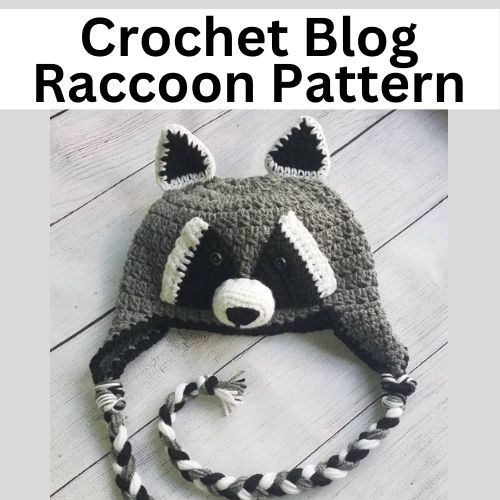
Do you love Raccoons? Aren’t they adorable especially when they use
their paws like hands? Raccoons are known to have a great sense of
tough. They are extremely smart and have been known to even
outsmart scientists. One of the cutest features we all love is the
“bandit mask” Even though it is cute it also helps raccoons to see
at night and to reduce glare from the sunlight during the day.

As an amazon associate this post contains affiliate links if you choose to make a purchase after linking a link I may receive a commission at no extra cost to you.
Materials:
#4 medium-weight yarn
1 skein Dark Gray
1 skein Black
1 skein White
Scissors
5mm crochet hook
4mm crochet hook
Metal yarn needle
Fluffing/ poly-fil
12mm safety eyes
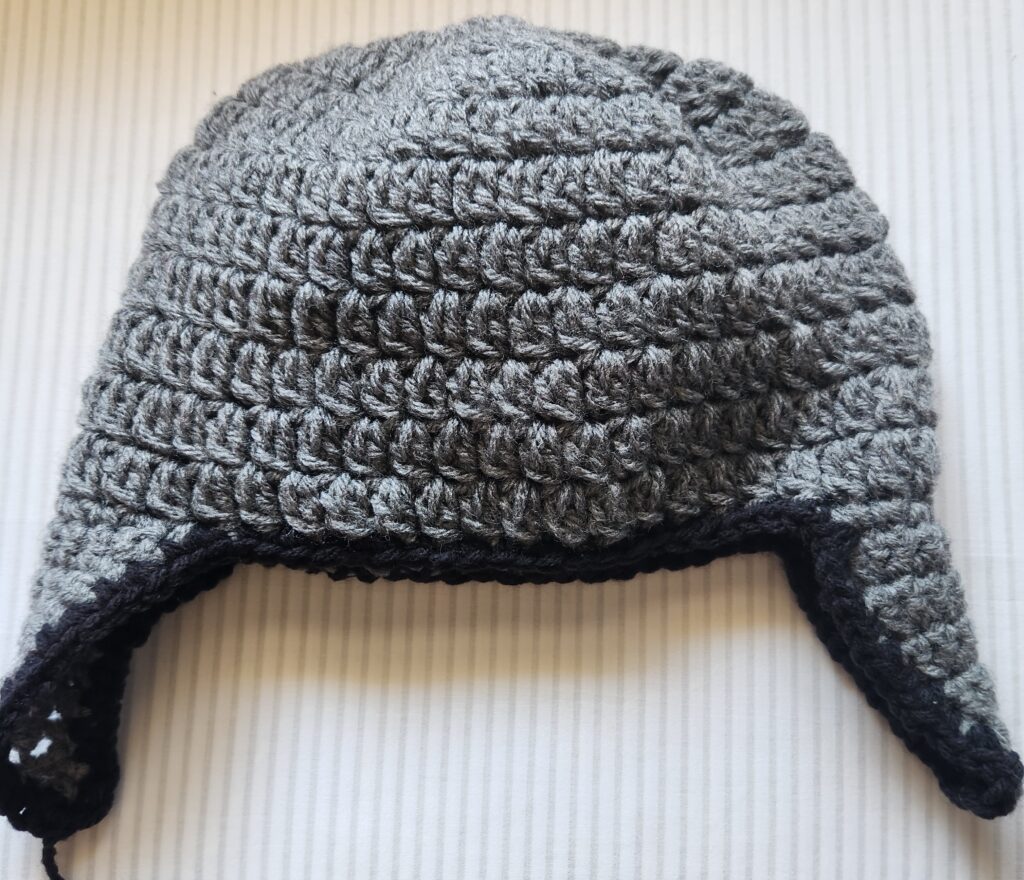
We will first begin with making a gray hat above the link to *my comfy hat pattern* Next we will add the black border around the hat.
This is available in PDF format that is easy to follow click HERE
Onto making the eyes:
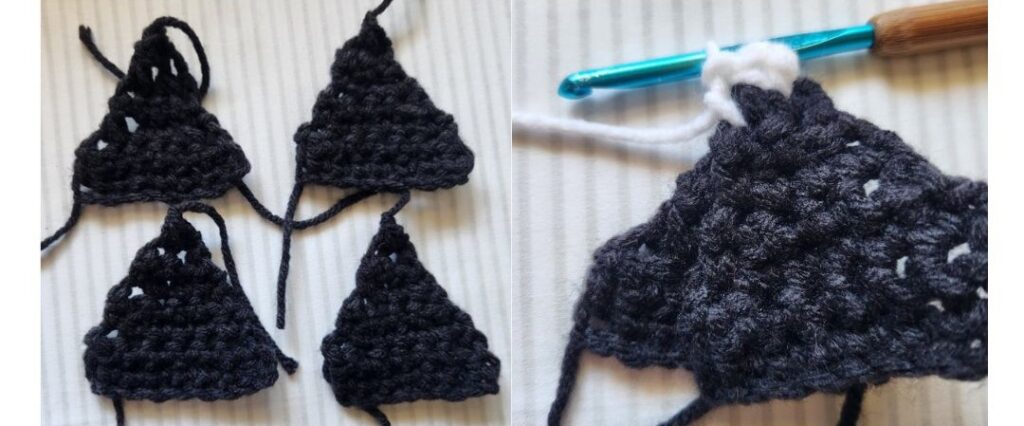
Using your 5mm crochet hook make 2, starting with black yarn. Chain 2, then make 4 double crochets in a magic circle. Pull yarn tail tight to close circle. Chain 2, turn your work, make 2 double crochets in the first and last stitches with only making 1 double crochet in the middle two stitches. Chain 2, for this row we will make 2 double crochet in the first stitch, then 1 double crochet in next four stitches, then 2 double crochets in the last stitch. Then we will chain 2, and make 2 double crochet in the first stitch with 1 double crochet in the middle 6 stitches, and make 2 double crochet in the last stitch. Then we will chain 2, make 2 double crochet in the first stitch with 1 double crochet in the middle 8 stitches, and make 2 double crochet in the last stitch. Fasten off black yarn leaving a long tail to sew eyes onto the hat.
We will attach White Yarn to the first double crochet of the last row with a slip stitch and making 1 double crochet in each stitch across.
Onto making the snout:
Using 4mm crochet hook, and White Yarn. We will begin with Chain 6 and make 3 single crochet in the second chain from our hook make 1 single crochet in the next three stitches, then we will do 3 single crochets in the same stitch, and then 1 single crochet in the next three stitches. Make 2 single crochets in the next 3 stitches make 1 single crochet in the next three stitches, then make 2 single crochets in the next three stitches, then single crochet 1 in the next four stitches. We then will make 2 single crochets in the next stitch, 1 single crochet in the next, 2 single crochet in the next, 1 single crochet and then 2 single crochet in the same stitch, we will single crochet in the next four stitches, then make 2 single crochet in the same stitch, 1 single crochet in the next, 2 single crochet in the next stitch, 1 single crochet in the next, and 2 single crochet in the next stitch, then 1 single crochet in every stitch for a total of 6 rows.
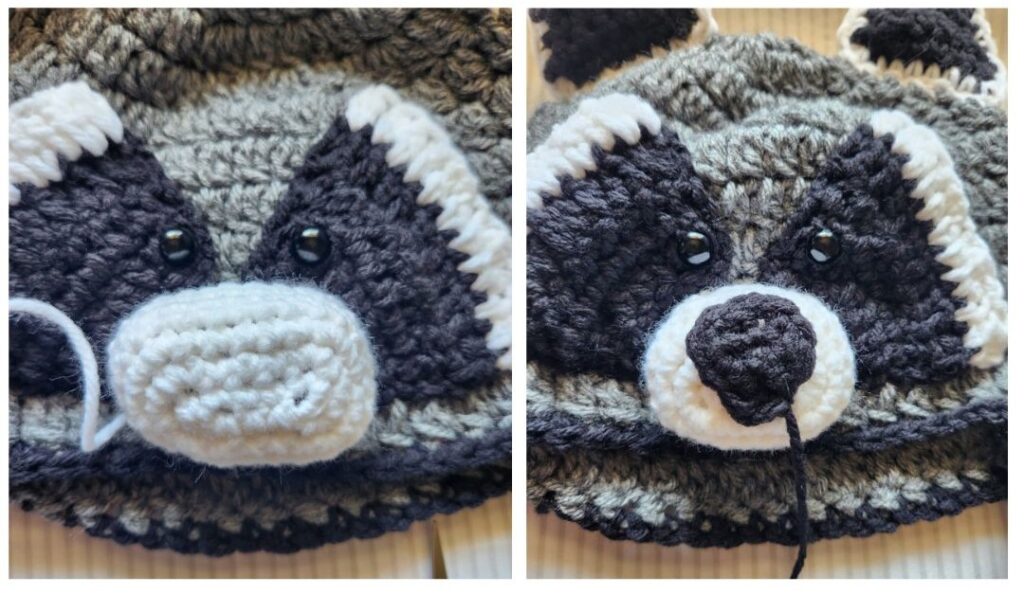
Onto making the nose:
Using 4mm crochet hook, and Black Yarn. Chain 3, in the second chain from the hook make 1 single crochet and 1 single crochet in the next stitch. Chain 1, turn your work, sc2tog, chain 1 and create a border around the nose putting 2 single crochets in each corner to keep the triangle shape. Leave a long tail to sew onto hat and add | under nose if desired.
Onto making the ears:
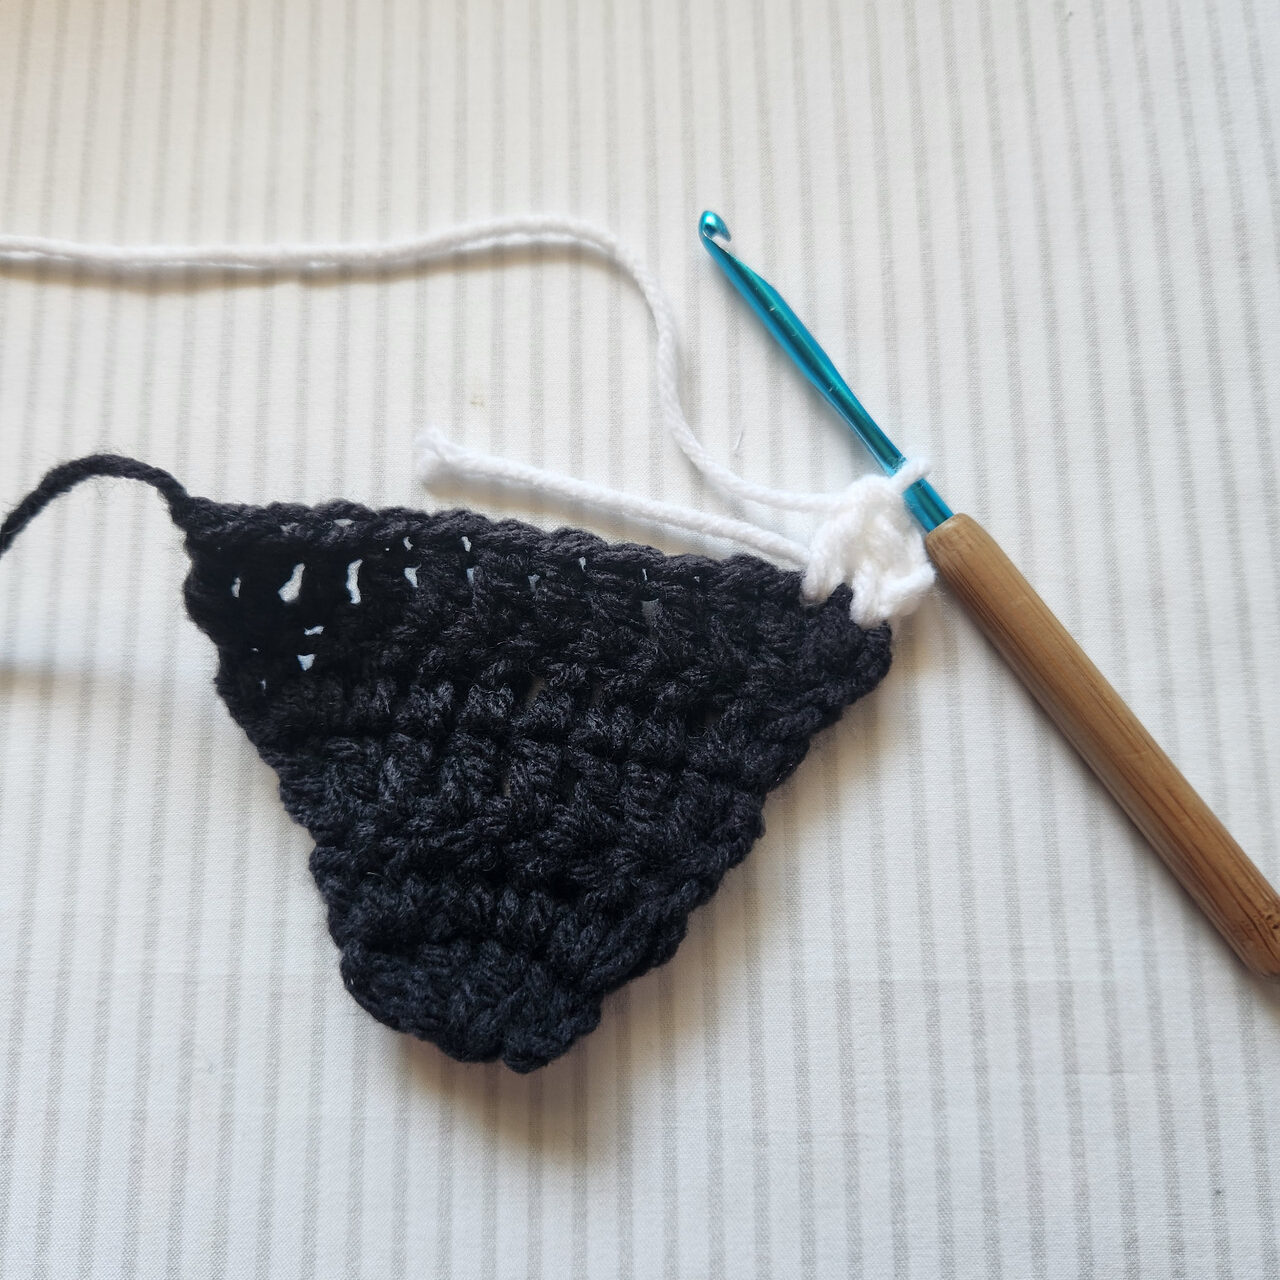
Using your 5mm crochet hook, we will make 4 different ears starting with black yarn. We will start with Chain 9, then single crochet in the second chain from the hook and make 8 single crochets across. Chain 1, turn your work, make 2 single crochets together (sc2tog), 1 single crochet in the next 4 stitches then make sc2tog in the last two stitches. Chain 1, turn your work, make 1 single crochet in the next six stitches. Chain 1, turn, we will do sc2tog, then single crochet in the next four stitches, and sc2tog in the last two stitches. Chain 1, turn your work, make 1 single crochet in the next six stitches. Chain 1, turn your work and make sc2tog in the first two stitches and then 1 single crochet in the next 2 stitches, then sc2tog in the last two stitches. Chain 1, turn your work, single crochet in the next 4 stitches. Ch 1, turn your work and make sc2tog in the first two stitch and sc2tog in the last two stitches. Chain 1, turn your work making sc2tog in the last two stitches. Fasten off.
Switching to our white yarn we will connect two black ears using our crochet hook and white yarn. Starting at the bottom left corner of the ear, (you will be holding the ear upside down) Attach with a slip stitch and then make 2 single crochet in the first stitch and then make 1 single crochet along the bottom of the ear, making 2 single crochets in the next corner and 1 single crochet along the other side of the ear. Make 3 single crochets in the tip of the ear, then 1 single crochet along the last side of the ear, and slip stitch to the first white single crochet of the row. Fasten off leaving a long tail to sew the ear onto the hat.
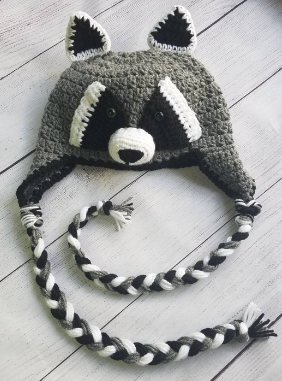
Assembly:
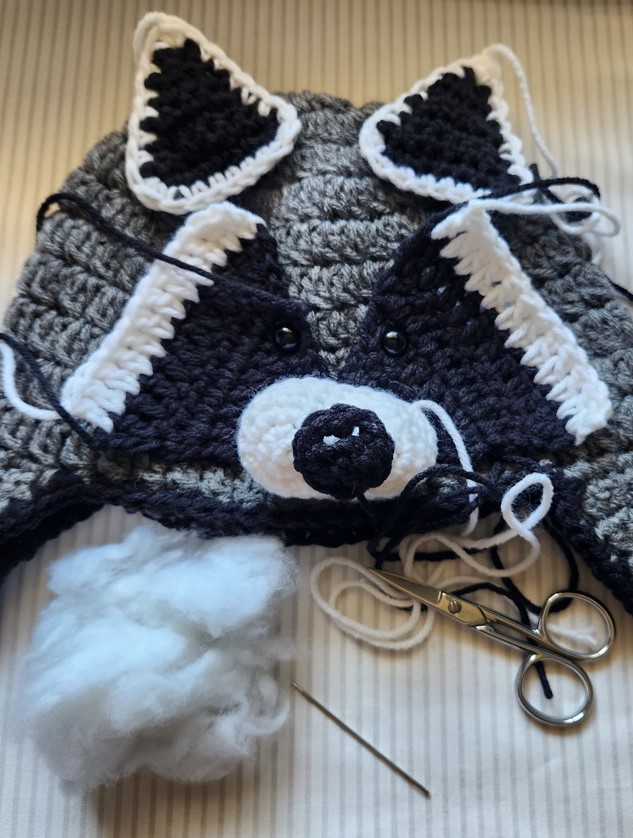
Now that we have all of our raccoon pieces I first begin with adding my safety eyes and cutting off the sharp tip so it doesn’t poke you in the head.
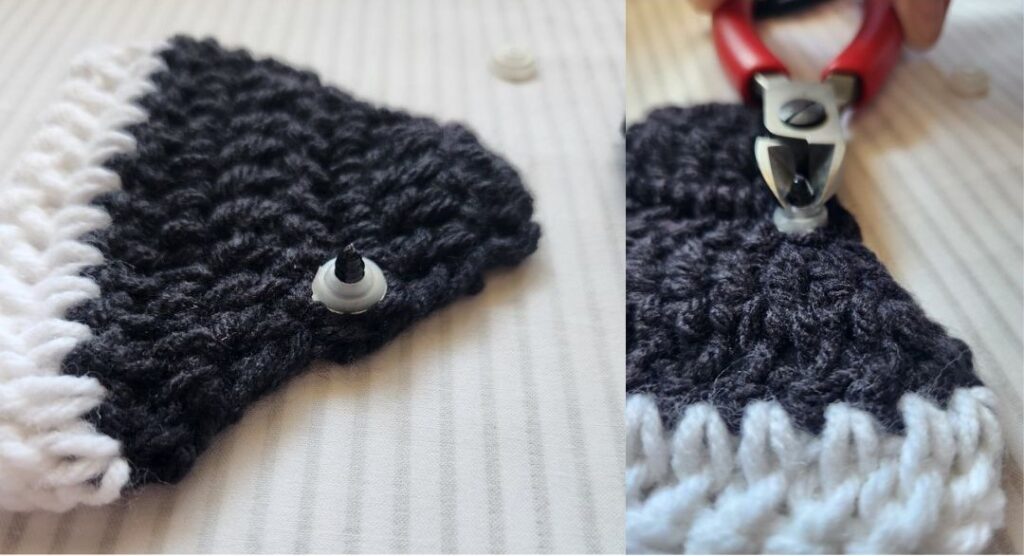
You can add hot glue to make the safety eyes more secure especially if you would like to wash your hat.
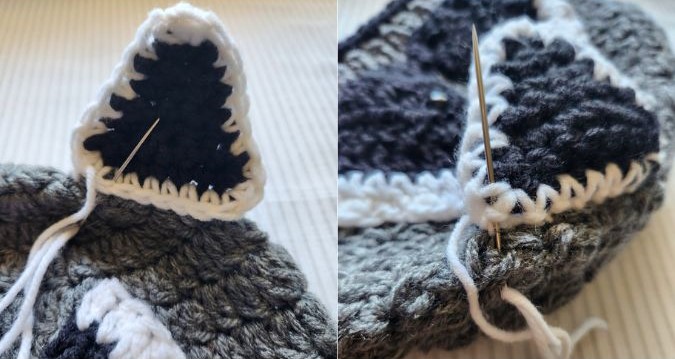
After attaching the safety eyes I get the eye masks and place them on the hat lining the white edges up with the beginning of the earflap to ensure your face isn’t too close together or too fast apart.
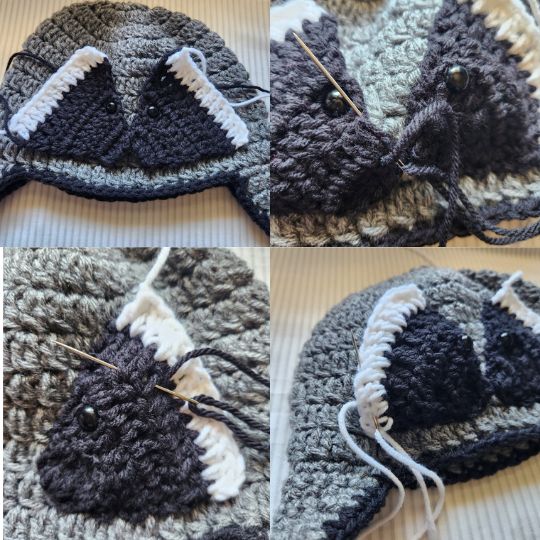
Using your yarn needle to secure them on the hat I use the long black yarn tail to secure the black part of the eye mask and then use the white yarn tail to secure the white top edge to the hat.
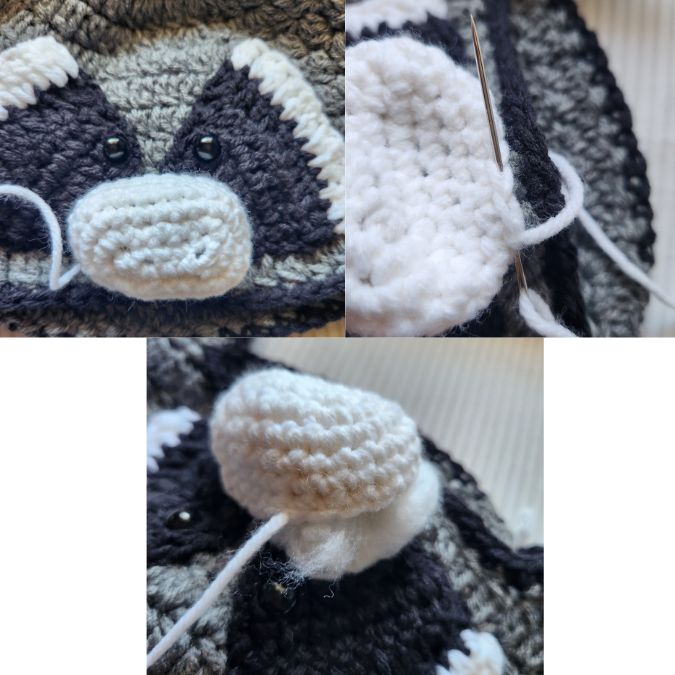
Next, I place and secure the snout so it’s between the eyes evenly. Sew the snout on until there is an inch left to secure, add your stuffing, it does take very much to fill it but be sure not to overstuff as it will stretch the inside of the hat and stuffing can fall out.
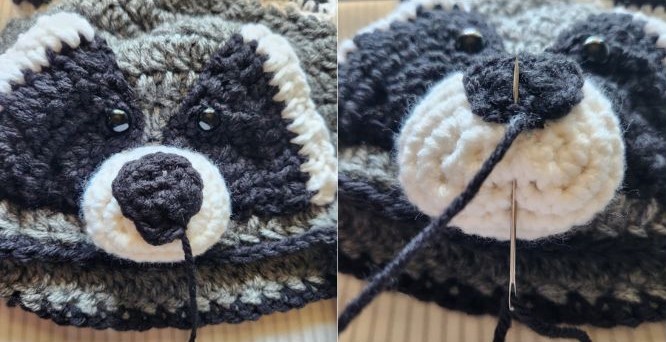
Now we can attach the black nose to the snout, sew around the border to secure and then insert the needle for how long you want the line to go down under the nose.
We can move onto the ears and use our yarn needle and white thread I begin sewing from left to right and I line the right side of my left ear up to the 3rd row down from the top of the hat. Then for my other ear, I go down 3 rows and attach the right ear.
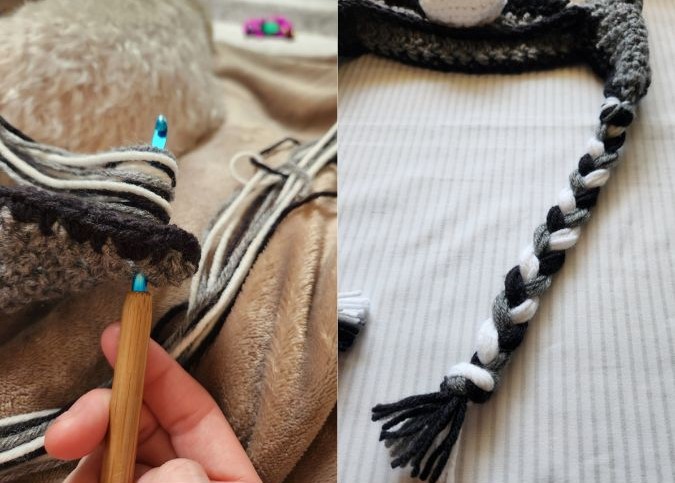
To make the braids I cut 24-inch long pieces and cut 4 strains of each color for one ear flap braid. And cut another 4 for the other side. Lay the strains out evenly and place your crochet hook in the ear flap from outside to inside grabbing the yarn strains and pull through making a loop, put your hook down and pull the strains through with your finger and loop around to make a knot. Do the same for the other side.